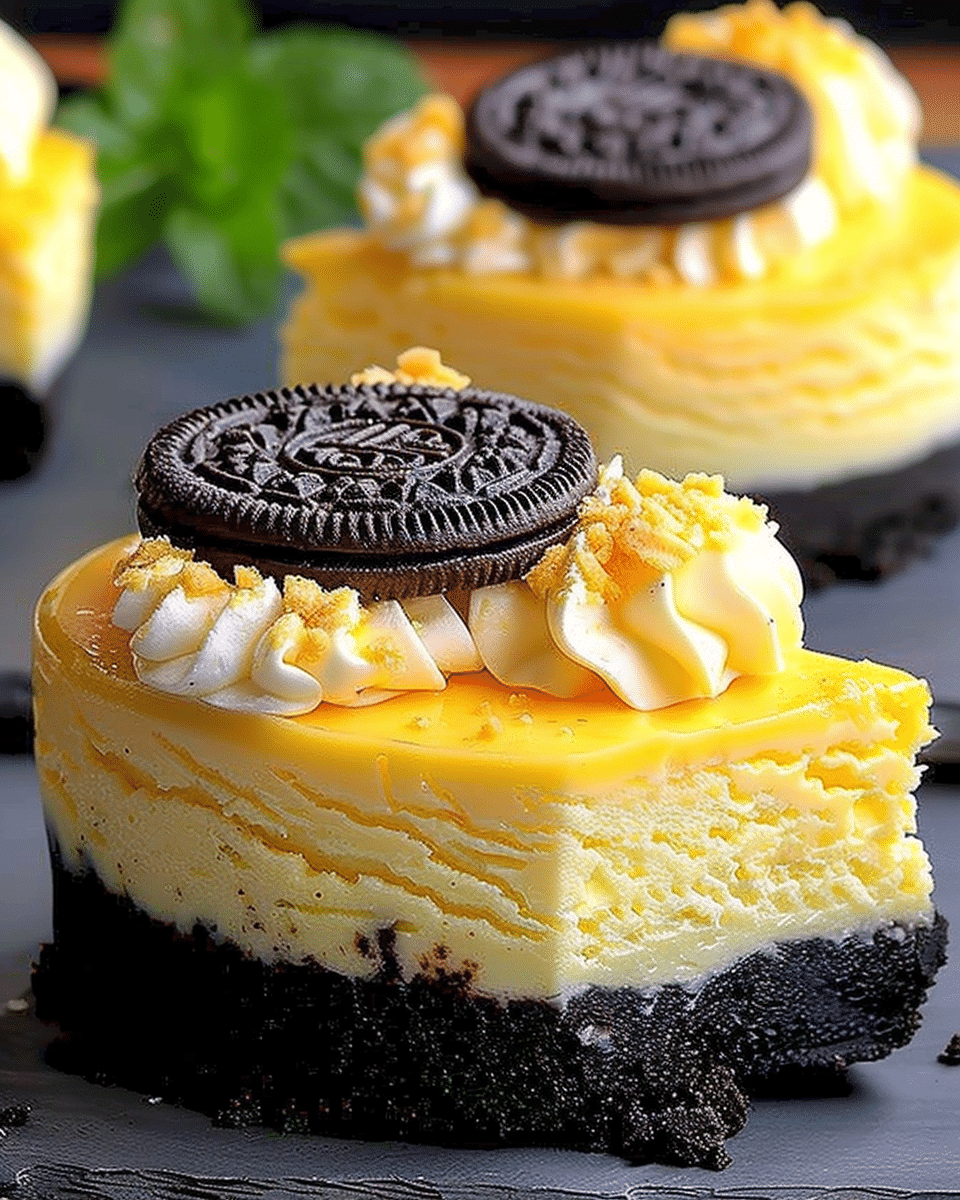
A bright and elegant twist on the classic cheesecake, this Yellow Velvet Cheesecake stands out with its creamy, soft yellow filling and a crunchy Oreo cookie base. The balance between the velvety texture of the cream cheese layer and the rich chocolatey crunch of the Oreos creates a dessert that’s as beautiful as it is indulgent.
Why You’ll Love This Recipe
I love how this cheesecake combines the smoothness of a classic cheesecake with a fun, colorful twist. The yellow hue makes it perfect for spring or any special occasion where I want something cheerful on the dessert table. I also appreciate that I can make it baked or no-bake, depending on my time and preference. The Oreo base adds just the right amount of crunch, balancing the light and creamy texture of the filling.
Ingredients
(Tip: You’ll find the full list of Ingredients and measurements in the recipe card below.)
For the base:
• 200 g Oreo cookies (crushed)
• 100 g melted butter
For the cream:
• 500 g cream cheese
• ¾ cup granulated sugar
• 1 cup heavy cream (cold)
• 2 tablespoons cornstarch
• 1 teaspoon vanilla extract
• 1 teaspoon white vinegar or lemon juice
• ½ cup milk
• A few drops yellow food coloring
For the topping:
• Whipped cream
• Crushed Oreos
Directions
I start by preparing the base. I mix the crushed Oreos with melted butter until everything is evenly coated. Then I press the mixture into the bottom of a springform pan and chill it for about 10 minutes.
Next, I prepare the cream by beating the cream cheese and sugar together until smooth and creamy.
I add the vanilla, milk, vinegar (or lemon juice), and yellow food coloring, mixing until fully incorporated.
I gently fold in the cold heavy cream and cornstarch using a spatula until I get a light and creamy consistency.
I pour this creamy mixture over the Oreo base, spreading it evenly.
For a baked version, I bake the cheesecake at 160°C (320°F) for about 50–60 minutes. For a no-bake version, I simply refrigerate it overnight until it sets beautifully.
Once it’s ready, I garnish it with whipped cream and crushed Oreos for an elegant and delicious finish.
Servings and Timing
This recipe makes about 10–12 servings.
Preparation time: 25 minutes
Cooking time (if baked): 50–60 minutes
Chilling time (for no-bake): Overnight (at least 6 hours)
Variations
I sometimes use Golden Oreos for a lighter flavor and a fully yellow look. If I want to add some fruitiness, I mix in a bit of lemon zest or even a few drops of lemon extract instead of vanilla. For a festive touch, I top it with fresh berries or edible flowers instead of whipped cream.
Storage/Reheating
I store the cheesecake in an airtight container in the refrigerator for up to 4 days. For longer storage, I freeze individual slices wrapped in plastic wrap and foil for up to 2 months. When I’m ready to enjoy it again, I thaw it in the refrigerator overnight. Since this is a cheesecake, I don’t reheat it, but I serve it chilled for the best flavor and texture.
FAQs
How can I make this cheesecake without food coloring?
I can skip the food coloring entirely and still get a delicious vanilla cheesecake, or I can use a bit of natural turmeric or saffron for a subtle yellow tint.
Can I use a different type of cookie for the base?
Yes, I sometimes replace Oreos with digestive biscuits, graham crackers, or Biscoff cookies depending on the flavor I’m aiming for.
What’s the best way to prevent cracks in a baked cheesecake?
I bake it at a low temperature and let it cool gradually in the oven with the door slightly open to prevent sudden temperature changes.
Can I make this cheesecake in advance?
Absolutely. I like making it a day ahead because the texture improves after chilling overnight, making it even creamier.
Can I make it gluten-free?
Yes, I can simply use gluten-free Oreo-style cookies for the base and make sure my cornstarch and other ingredients are certified gluten-free.
Conclusion
This Yellow Velvet Cheesecake with Oreo Base is a show-stopping dessert that combines creamy elegance with playful color. I love how simple yet impressive it is—perfect for gatherings, celebrations, or just when I want to treat myself to something special. Whether baked or no-bake, it’s always smooth, rich, and irresistibly delicious.
This Yellow Velvet Cheesecake with an Oreo base is a stunning dessert that combines a vibrant yellow cream cheese filling with a crunchy chocolate cookie crust. It’s smooth, indulgent, and perfect for any celebration or spring-inspired occasion.
Ingredients
Base:
200 g Oreo cookies, crushed
100 g melted butter
Cream Filling:
500 g cream cheese
¾ cup granulated sugar
1 cup heavy cream (cold)
2 tablespoons cornstarch
1 teaspoon vanilla extract
1 teaspoon white vinegar or lemon juice
½ cup milk
Few drops yellow food coloring
Topping:
Whipped cream
Crushed Oreos
Instructions
Combine crushed Oreos and melted butter. Press into a springform pan base and chill for 10 minutes.
Beat cream cheese and sugar until smooth. Add vanilla, milk, vinegar/lemon juice, and food coloring. Mix well.
Fold in cold heavy cream and cornstarch until combined and creamy.
Pour mixture over Oreo base and smooth the top.
Baked version: Bake at 160°C (320°F) for 50–60 minutes. Let cool, then refrigerate.
No-bake version: Refrigerate overnight (at least 6 hours) until set.
Top with whipped cream and crushed Oreos before serving.
Notes
Use Golden Oreos for a lighter crust.
Add lemon zest for a citrusy twist.
Top with berries or edible flowers for an elegant look.
Can be made a day ahead for better texture.
Use turmeric or saffron for natural coloring if desired.


