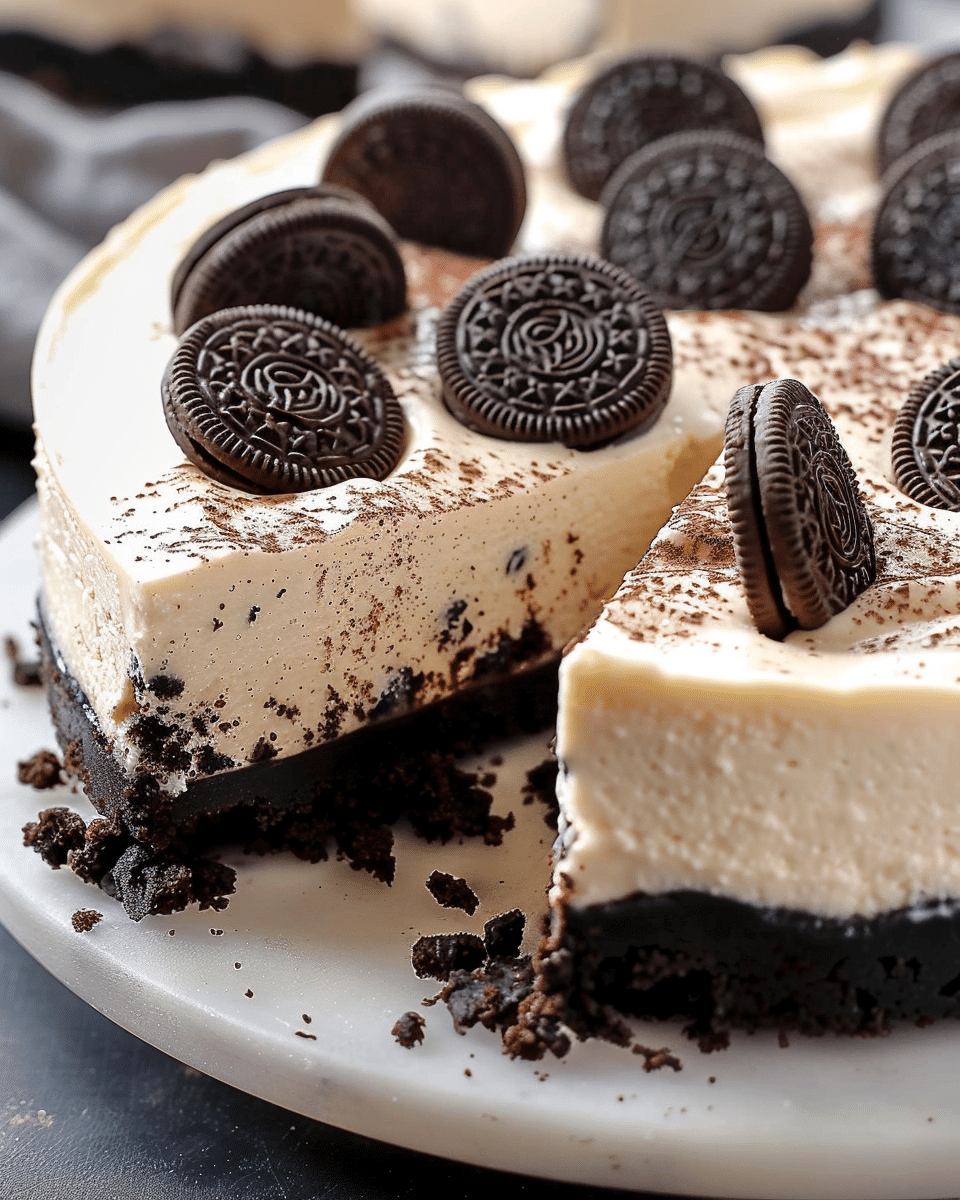
This Oreo Cheesecake is a luscious, creamy dessert with layers of rich cream cheese filling, crunchy Oreo crust, and cookie-studded topping. It’s the kind of dessert that makes me pause mid-bite just to savor the moment. Whether I’m serving it to a crowd or indulging solo on a quiet night, it always delivers that perfect balance of smooth and crunchy textures with a deep cookies-and-cream flavor.
Why You’ll Love This Recipe
I love this recipe because it’s a total crowd-pleaser with minimal fuss. Here’s why I keep coming back to it:
It’s incredibly easy to make with just a handful of steps.
The Oreo crust adds the perfect crunch to balance the creamy filling.
It looks impressive and tastes even better—ideal for entertaining.
I can make it ahead, which makes it perfect for events or weekend treats.
Every bite is rich, indulgent, and full of nostalgic cookie flavor.
Ingredients
(Here’s a tip: Check out the full list of ingredients and measurements in the recipe card below.)
24 Oreos (for crust)
4 Oreos (for garnish)
1/4 cup unsalted butter (melted)
16 oz cream cheese (softened)
1/2 cup sour cream
3/4 cup granulated sugar
2 tsp vanilla extract
3 large eggs
Directions
Step 1: Prepare the Crust I start by preheating my oven to 350°F (175°C). Then, I crush 24 Oreos in a food processor until they’re fine crumbs. I mix in the melted butter and press the mixture into the bottom of a springform pan to form the crust.
Step 2: Make the Filling In a large bowl, I beat the softened cream cheese until smooth. I gradually add the sugar, then stir in the sour cream and vanilla until everything is fully blended.
Step 3: Add the Eggs Next, I add the eggs one at a time, mixing on low speed. I make sure not to overmix—just enough so everything is smooth and creamy.
Step 4: Bake the Cheesecake I pour the cream cheese mixture over the crust and bake for about 50–60 minutes. The center should be set but still slightly jiggly when it’s ready.
Step 5: Cool and Chill After baking, I let it cool in the oven with the door slightly open for an hour. Then I transfer it to room temperature before refrigerating it for at least four hours or overnight.
Step 6: Garnish and Serve Right before serving, I top it with whipped cream and crushed Oreos for that final decadent touch.
Servings and timing
Servings: 12 slices
Prep Time: 20 minutes
Cook Time: 60 minutes
Cooling & Chilling Time: 5 hours
Total Time: Approximately 6 hours 20 minutes
Variations
Sometimes I like to switch it up with these variations:
Chocolate Chip Twist: I stir in mini chocolate chips into the filling for extra texture.
Minty Version: I use mint Oreos and a drop of peppermint extract for a holiday feel.
Caramel Drizzle: I drizzle caramel sauce on top before serving for a richer finish.
Peanut Butter Swirl: I swirl a few tablespoons of peanut butter into the batter before baking.
Gluten-Free Option: I use gluten-free sandwich cookies for a celiac-friendly dessert.
Storage/Reheating
I store leftover cheesecake in an airtight container in the fridge for up to five days. For longer storage, I slice it and freeze individual pieces wrapped tightly in plastic wrap and foil. When I’m ready to eat, I let it thaw in the fridge overnight or at room temperature for a couple of hours. I never microwave it—it’s best enjoyed cold or at room temperature.
FAQs
How long should I chill Oreo Cheesecake?
I always chill it for at least four hours, but overnight gives it the best flavor and texture. That resting time helps the cheesecake set perfectly.
Can I use low-fat cream cheese in my Oreo Cheesecake?
Yes, I’ve tried it with low-fat cream cheese, and it still tastes great. Just keep in mind the texture might be slightly less rich and creamy.
How do I store leftover Oreo Cheesecake?
I keep mine in an airtight container in the fridge for up to five days. If I need to store it longer, I freeze individual slices and thaw them when needed.
What’s the best way to crush Oreos for the crust?
I use a food processor to get fine, even crumbs, but a zip-top bag and rolling pin also work if I want a more hands-on approach.
Can I make this cheesecake ahead of time?
Absolutely! I often make it a day or two in advance so it has plenty of time to chill and develop that perfect texture.
Conclusion
Making this Oreo Cheesecake is always a joy for me. It’s simple, indulgent, and practically foolproof. The creamy filling and crunchy cookie crust make it irresistible, whether I’m enjoying a quiet night in or sharing with friends. If I want to impress without too much effort, this is my go-to dessert. It’s a slice of happiness I can never get enough of.
This decadent Oreo Cheesecake features a crunchy Oreo crust, rich and creamy filling, and a cookie-studded topping. It’s the perfect indulgent dessert for any occasion, easy to make and always a hit.
Ingredients
24 Oreos (for crust)
4 Oreos (for garnish)
1/4 cup unsalted butter, melted
16 oz cream cheese, softened
1/2 cup sour cream
3/4 cup granulated sugar
2 tsp vanilla extract
3 large eggs
Whipped cream (for topping, optional)
Instructions
Preheat oven to 350°F (175°C). Crush 24 Oreos into fine crumbs and mix with melted butter.
Press the mixture into the bottom of a springform pan to form the crust.
In a large bowl, beat softened cream cheese until smooth. Gradually add sugar, then mix in sour cream and vanilla extract until combined.
Add eggs one at a time, mixing on low speed until just blended. Do not overmix.
Pour the filling over the crust. Bake for 50–60 minutes, until the center is set but slightly jiggly.
Cool in the oven with the door slightly open for 1 hour, then bring to room temperature. Refrigerate for at least 4 hours or overnight.
Before serving, top with whipped cream and crushed Oreos.
Notes
Use mini chocolate chips in the batter for extra texture.
Try mint Oreos and peppermint extract for a festive variation.
Drizzle with caramel or swirl in peanut butter for added richness.
Use gluten-free sandwich cookies for a gluten-free version.


