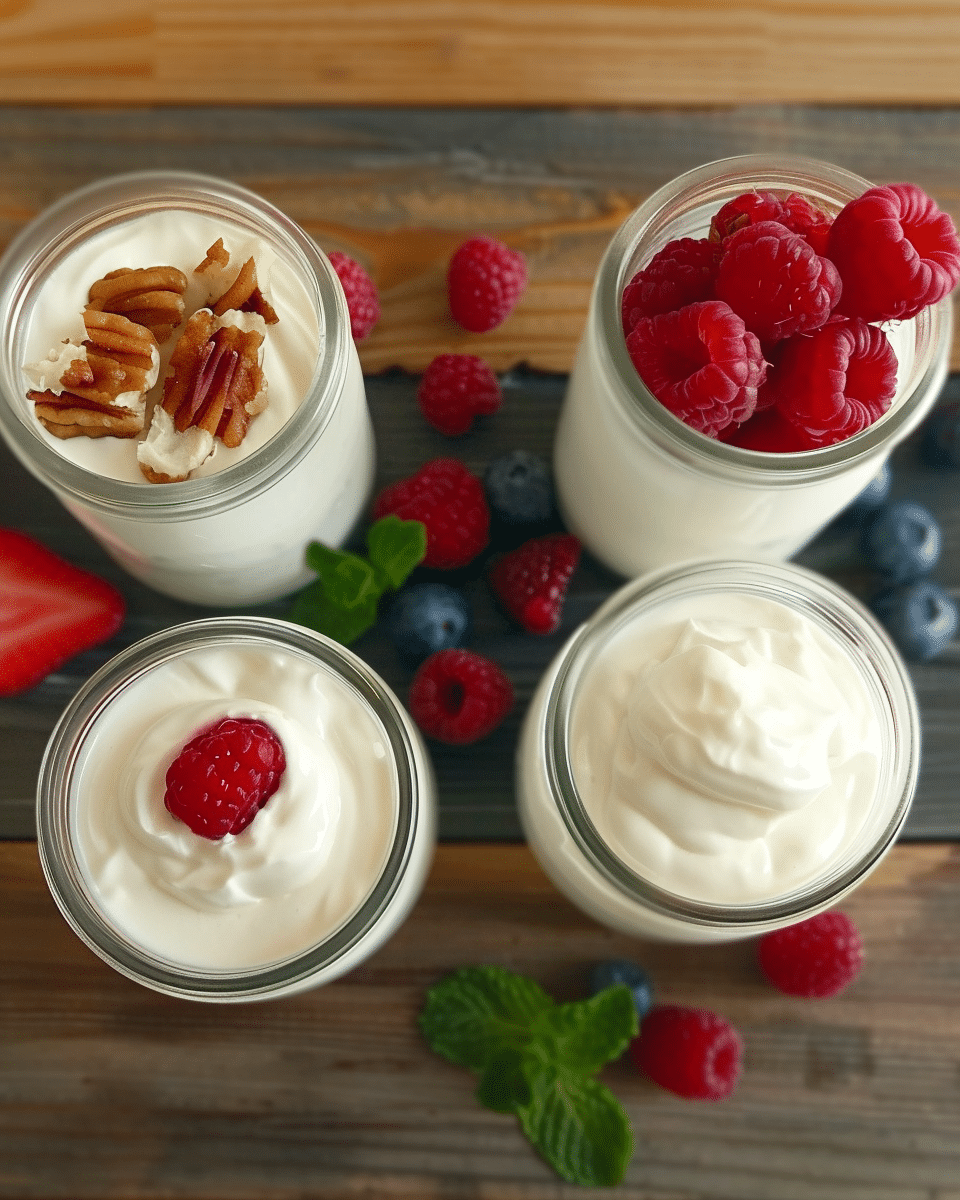
Homemade yogurt is one of those simple pleasures I keep coming back to. It’s fresh, creamy, and so much better than anything I can buy at the store. Whether I’m craving something tangy to go with breakfast or looking for a healthy snack, homemade yogurt fits the bill. Best of all, I know exactly what goes into it.

Why You’ll Love This Recipe
I love making yogurt at home because it’s customizable, cost-effective, and surprisingly easy. I get to control the flavor, sweetness, and thickness, and I don’t have to worry about preservatives or artificial additives. Once I made my first batch, I realized how convenient it is to always have fresh yogurt on hand—ready to pair with fruit, granola, or enjoy as is.
Ingredients
(Here’s a tip: Check out the full list of ingredients and measurements in the recipe card below.)
For Basic Yogurt
4 cups whole milk (or any milk I prefer)
2 tablespoons plain yogurt with live cultures (from store-bought or a previous batch)
1/4 cup powdered milk (optional, for extra creaminess)
2 tablespoons sugar (optional)
For Greek-Style Yogurt
4 cups whole milk
2 tablespoons plain yogurt with live cultures
Cheesecloth or a fine mesh strainer
(Optional: 1 tablespoon heavy cream for added richness)
For Flavored Yogurt
4 cups homemade yogurt (plain or Greek-style)
1/4 cup fruit puree (like strawberry, mango, or blueberry)
2 tablespoons honey or maple syrup (optional)
Directions
1. Heat the Milk
I pour the milk into a saucepan and heat it over medium heat until it reaches 180°F (82°C), just below boiling. This step helps create a smoother, thicker yogurt.
2. Cool the Milk
Next, I let the milk cool down to about 110°F (43°C)—the sweet spot for culturing yogurt.
3. Add the Yogurt Starter
I mix 2 tablespoons of plain yogurt with a little cooled milk to make it smooth, then whisk it back into the whole pot of milk.
4. Let It Set
I pour the mixture into a clean container, cover it, and place it in a warm spot (like my oven with the light on). I let it sit undisturbed for 4–12 hours depending on how tangy I want it.
5. Refrigerate
Once it’s set, I move the yogurt to the fridge for at least 2 hours. This helps firm it up and improves the texture.
6. For Greek-Style Yogurt
After chilling, I strain the yogurt through cheesecloth for 1–2 hours to remove the whey. The longer I strain it, the thicker it gets.
7. For Flavored Yogurt
Once the yogurt is ready and cold, I stir in fruit puree and sweeteners like honey or maple syrup. For extra smoothness, I mix the flavor in before chilling.
Servings and Timing
This recipe yields about 4 servings.
Prep time: 15 minutes
Cook time: 15 minutes
Incubation time: 4 to 12 hours
Chilling time: 2 hours
Variations
-
Dairy-Free Yogurt: I use coconut, almond, or soy milk along with a plant-based yogurt starter.
-
Extra Creamy Yogurt: I add a tablespoon of heavy cream before heating the milk.
-
Flavor Boosts: Vanilla extract, cinnamon, or even cocoa powder give the yogurt unique twists.
-
Layered Fruit Parfaits: I layer the yogurt with granola and chopped fruit for a quick breakfast.
Storage/Reheating
I store my homemade yogurt in a sealed container in the refrigerator for up to 7 days.
If I make a big batch, I keep a few small jars for grab-and-go convenience.
Reheating isn’t necessary, but if I’m using it in warm recipes (like sauces or baking), I let it sit at room temperature for 10–15 minutes to take off the chill.
FAQs
How do I know when the yogurt is done setting?
I check the texture. It should be thickened and slightly jiggly. If it’s still runny, I let it sit for a few more hours in the warm spot.
Can I reuse homemade yogurt as a starter?
Yes, I always save 2 tablespoons from each batch to use as a starter for the next. After 4–5 batches, I usually start fresh with store-bought yogurt to ensure strong cultures.
Why is my yogurt runny?
This usually happens if the milk didn’t stay warm enough during incubation, or if the starter wasn’t active. Straining it can also help thicken it up.
Is powdered milk necessary?
Not at all—but I like to add it for a thicker, creamier consistency. It’s completely optional.
Can I sweeten the yogurt before fermentation?
I prefer not to. Adding sugar before incubation can sometimes interfere with bacterial growth. I sweeten it after it sets and chills.
Conclusion
Making yogurt at home has become a favorite kitchen ritual of mine. It’s simple, satisfying, and delivers delicious results every time. Whether I’m enjoying it plain, thick like Greek yogurt, or swirled with fruit puree, it’s a healthy treat that I feel great about. Once I started making my own, I never looked back—and I bet once I try it, I won’t either.

Easy Homemade Yogurt Recipe
5 Stars 4 Stars 3 Stars 2 Stars 1 Star
No reviews
- Author: Olivia
- Total Time: 6 to 14 hours (including incubation and chilling)
- Yield: 4 servings
- Diet: Vegetarian
Description
This easy homemade yogurt recipe yields fresh, creamy, and customizable yogurt with just two ingredients. Whether you prefer it plain, Greek-style, or flavored, it’s a healthy and satisfying treat you can make in your own kitchen.
Ingredients
4 cups whole milk (or preferred milk)
2 tablespoons plain yogurt with live cultures
Optional: 1/4 cup powdered milk (for creaminess)
Optional: 2 tablespoons sugar (for slight sweetness)
For Greek yogurt: cheesecloth or fine mesh strainer
Optional: 1 tablespoon heavy cream (for extra richness)
For flavored yogurt: 1/4 cup fruit puree + 2 tablespoons honey or maple syrup
Instructions
- Heat the milk in a saucepan over medium heat until it reaches 180°F (82°C). Do not boil. Remove from heat.
- Let the milk cool to 110°F (43°C).
- In a small bowl, mix 2 tablespoons yogurt with a little cooled milk, then whisk it into the pot of milk.
- Pour the mixture into a clean container, cover, and place in a warm spot (like an oven with the light on). Let it sit undisturbed for 4–12 hours until thickened.
- Refrigerate for at least 2 hours to firm up the texture.
- For Greek-style yogurt: strain the chilled yogurt through cheesecloth for 1–2 hours to remove whey.
- For flavored yogurt: stir in fruit puree and sweeteners once chilled. Mix well before serving.
Notes
- Use plant-based milk and a dairy-free starter for vegan yogurt.
- Add vanilla extract or spices for extra flavor.
- Layer with fruit and granola for parfaits.
- Don’t sweeten before fermentation—add it afterward.
- Save 2 tbsp of finished yogurt to use as a starter for the next batch.
- Prep Time: 15 minutes
- Cook Time: 15 minutes
- Category: Breakfast
- Method: Culturing
- Cuisine: Universal
Nutrition
- Serving Size: 1 cup
- Calories: 150
- Sugar: 9g
- Sodium: 120mg
- Fat: 8g
- Saturated Fat: 5g
- Unsaturated Fat: 2g
- Trans Fat: 0g
- Carbohydrates: 11g
- Fiber: 0g
- Protein: 8g
- Cholesterol: 25mg


