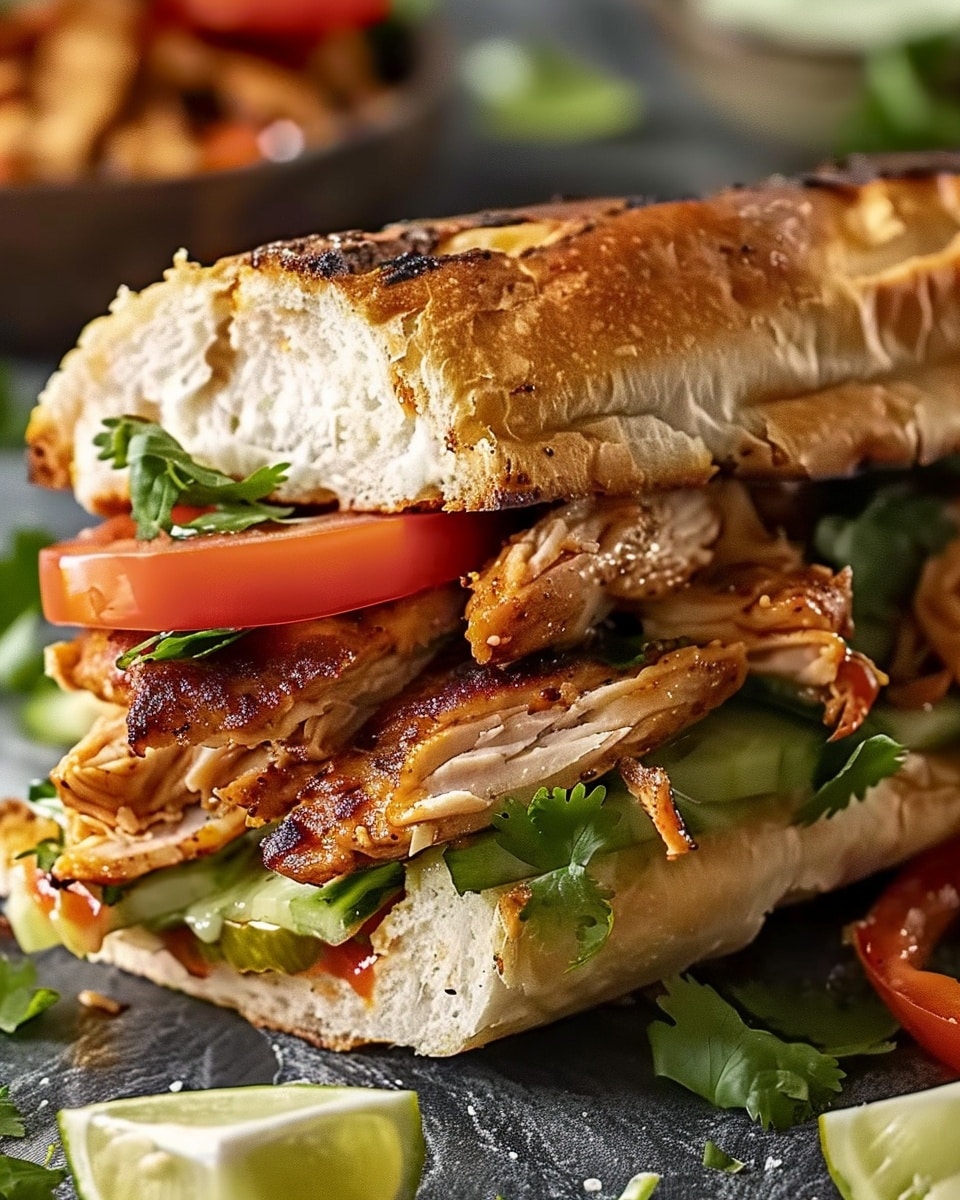
I love preparing this chicken torta sandwich when I want a meal that feels hearty, bold, and deeply satisfying. It brings together juicy, well-seasoned chicken with creamy beans, fresh vegetables, and a touch of heat, all packed into crisp yet soft bread. This sandwich always delivers big flavor while still being simple enough for everyday cooking.
Why You’ll Love This Recipe
I like this recipe because it balances richness and freshness perfectly. The chicken is flavorful and filling, while the avocado and beans add creaminess that pairs beautifully with crunchy vegetables. I also appreciate how easy it is to customize and how quickly it comes together once the chicken is cooked.
Ingredients
(Tip: You’ll find the full list of Ingredients and measurements in the recipe card below.)
2 telera or bolillo rolls
1 lb boneless, skinless chicken breast or thighs
1 tbsp chipotle in adobo
1 avocado, sliced
½ cup refried beans
½ cup shredded lettuce
1 medium tomato, sliced
¼ medium onion, thinly sliced
¼ cup pickled jalapeños
¼ cup queso fresco or mozzarella, crumbled or shredded
2 tbsp mayonnaise or crema
Salt and pepper to taste
1 tbsp olive oil for cooking
Directions
I begin by marinating the chicken with the chipotle in adobo, salt, and pepper, letting it rest for about 30 minutes so the flavor develops fully. I heat olive oil in a skillet or grill pan over medium heat and cook the chicken for 5 to 6 minutes per side until it’s cooked through. I let it rest briefly, then slice it thin.
I lightly toast the rolls until the outside is golden while the inside stays soft. I spread the refried beans evenly on the bottom half of each roll and the mayonnaise or crema on the top half. I layer the sliced chicken first, followed by avocado, cheese, lettuce, tomato, onion, and pickled jalapeños. I close the sandwiches and serve them immediately.
Servings And Timing
I usually make this recipe to serve 2 sandwiches.
Prep time: 15 minutes
Marinate time: 30 minutes
Cook time: 15 minutes
Total time: about 1 hour
Variations
I enjoy switching things up depending on my mood. Sometimes I add extra vegetables like grilled peppers or zucchini. When I want a richer flavor, I use chipotle mayo instead of regular mayonnaise. For a meat-free option, I replace the chicken with grilled vegetables or seasoned beans while keeping all the same toppings.
Storage/Reheating
I find this sandwich tastes best fresh, but I store leftovers by keeping everything separate. I refrigerate the cooked chicken and vegetables in airtight containers. When reheating, I warm the chicken in a skillet to keep it juicy. I always toast fresh bread just before assembling and avoid storing or freezing fully assembled sandwiches.
FAQs
Can I prepare the ingredients in advance?
I often cook the chicken and slice the vegetables ahead of time, but I assemble the sandwich right before eating for the best texture.
What if I can’t find telera or bolillo rolls?
I use a sturdy French roll or ciabatta, which holds up well to the fillings without getting soggy.
Can I use leftover cooked chicken?
I like using leftover or rotisserie chicken, as long as it’s warmed and seasoned before assembling the sandwich.
How spicy is this sandwich?
I control the spice level by adjusting the amount of chipotle and jalapeños, making it easy to keep it mild or add more heat.
What sides go well with a chicken torta?
I usually serve this with fries, tortilla chips, or a simple green salad.
Conclusion
I keep coming back to this chicken torta sandwich because it’s filling, flavorful, and easy to adapt. With its combination of juicy chicken, creamy layers, and fresh toppings, it’s a reliable choice whenever I want a satisfying meal that feels special without being complicated.
These Starbucks Copycat Cake Pops feature a moist vanilla cake mixed with creamy buttercream, rolled into bite-sized treats, and coated in a smooth pink candy shell with sprinkles. Perfect for parties or homemade gifts.
Ingredients
1 box (13.25 oz) vanilla cake mix
⅓ cup neutral oil (vegetable, avocado, or canola)
1 cup milk or water
4 large eggs
¼ cup unsalted butter, softened
1 cup powdered sugar
1 teaspoon vanilla extract
1 teaspoon milk (plus more if needed)
Pinch of salt
12 oz pink candy melts
White nonpareils or sprinkles
Instructions
Preheat the oven according to cake mix instructions (usually 325°F to 350°F). Grease or line a baking pan.
Mix cake mix, oil, milk, and eggs until smooth. Pour into pan and bake according to package directions. Let cool slightly.
While still warm, crumble the cake into a large bowl using a fork or hands.
In another bowl, mix softened butter, powdered sugar, vanilla, milk, and salt until smooth to make the buttercream.
Add buttercream to crumbled cake and mix until evenly combined.
Roll mixture into 1¼-inch balls (about 30 grams each). Freeze for 15 minutes.
Melt a small amount of candy melts. Dip the tip of each lollipop stick into the melted candy, then insert into each cake ball. Chill for another 15 minutes.
Melt remaining candy melts until smooth and thin. Dip each cake pop fully, tap off excess, and add sprinkles before coating sets.
Place cake pops upright until coating is fully set and dry.
Notes
Use chocolate cake mix for variation.
Change candy melt colors and sprinkles to match holidays or events.
Let cake pops sit at room temperature briefly before dipping to avoid cracking.
Keep cake balls small and chill thoroughly to prevent falling off sticks.


